
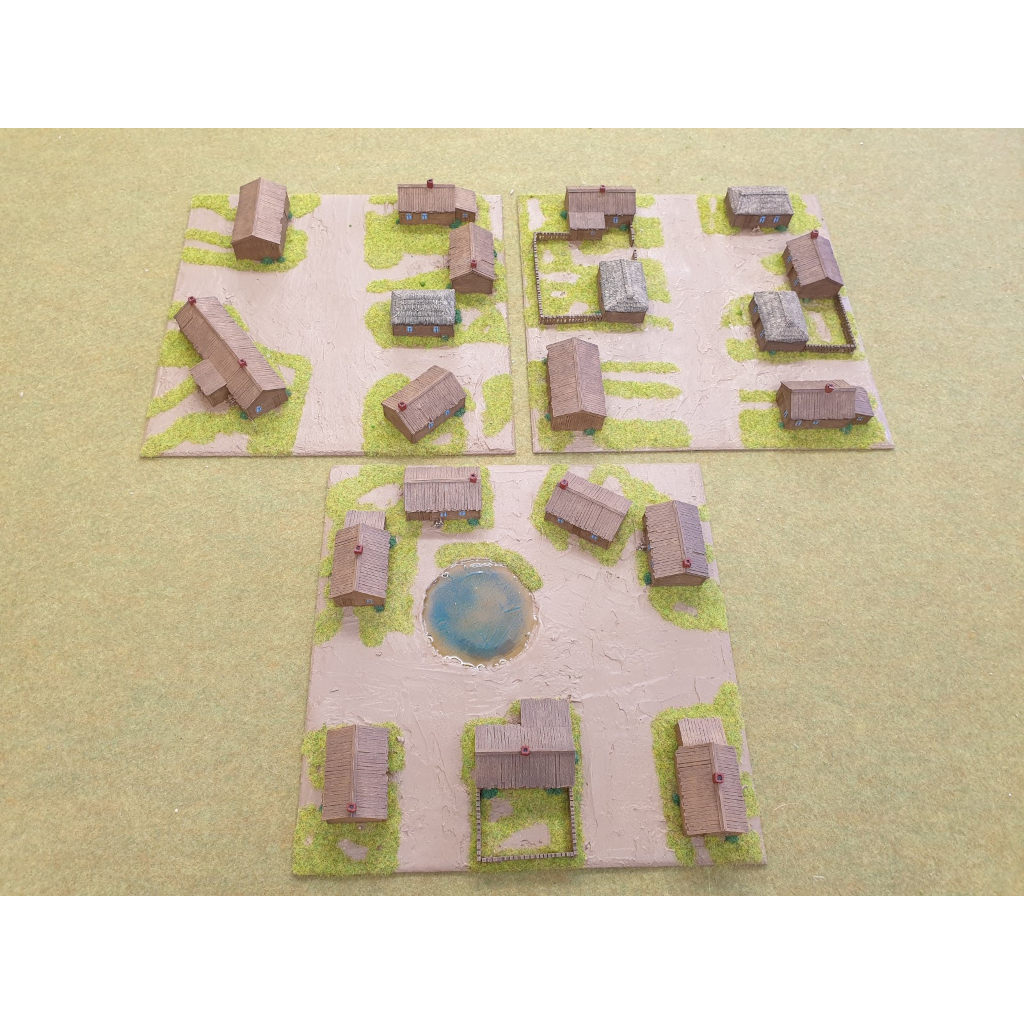
I tried my hand at Making Soviet Villages for my World War II Russian Front project, and I’m really pleased with how they turned out.


Making Soviet Villages
1. The first step is to cut your bases to the desired size either using MDF or hardboard in my case I used hardboard and cut it to 12 inch wide by 12 inch long once you have cut your bases to the desired size you then want to proceed to rasp the edges to give it a smoother appearance.

2. The second step is to place your buildings in the desired position.

3. The third step is to glue down your buildings and fencing using a glue gun.


4. The fourth step is to cover the base with Polycell Filler.


5. The fifth step is to paint the entire diorama Brown.

6. The sixth step is to dry brush the buildings with Vallejo 860, And dry brush the thatched roofs Vallejo 821.


7. The seventh step is to paint the windows Vallejo 844 and Varnish everything.

8. The Eighth step is to add Noch Summer Meadow Grass.


Tools
- Pencil
- Tape measure
- Wood saw
- Rasp
- Screwdriver
- Hammer
- Paintbrushes
- Glue Gun
Materials
- Hardboard
- Pendraken Miniatures, SCN-EF01, SCN-EF02, SCN-EF03, SCN-EF04, SCN-EF05, SCN-EF06, SCN-EF07
- Blotz, Fences – Rough
- Polycell Filler
- Ronseal Diamond Hard Varnish, matt clear
- Noch Summer Meadow Grass
- PVA
Vallejo Colours
- Vallejo 860 Medium Fleshtone
- Vallejo 821 German Cam Beige WWII
- Vallejo 844 Deep Sky Blue
- Valspar Brown
Other blog categories that may be of interest. 10mm ACW Project, 10mm AWI Project, 10mm AZW Project, 10mm CGW Project, 10mm FIW Project, 10mm Sci-Fi Projects, Aliens, Dropzone Commander, Terra Nova, 10mm WWI Project, 10mm WWII Project, 10mm Zombie Project, Battle Reports & Scenarios, Making Scenery & Terrain, Painting Guides, Shows & Events, Solo Wargaming, Wargaming Projects, Wargaming Rules.
Leave a Reply