
Making Stalingrad Ruined Factories an easy guide to follow. I needed some Stalingrad factory ruins for my World War II Russian Front project, I know that there are quite a few commercially available ruins which would have been more than suitable. However I really fancied having a go at building some of my own ruins and to be honest it was surprisingly easy. I hope you really enjoy this tutorial on how I completed this task.


Making Stalingrad Ruined Factories
1. Making Stalingrad Ruined Factory
1. The first stage was to draw a paper template of the actual buildings this stage probably took the longest as I had to redo it several times until I was happy with the end result. I made the template as generic as possible which would allow me to make four different buildings from the same template.
2. The next thing was to decide what size base I was going to use, I decided on 10 inches by 10 inches using my preferred basing material hardboard after cutting my bases I proceeded to rasp the edges to give it a smoother appearance.

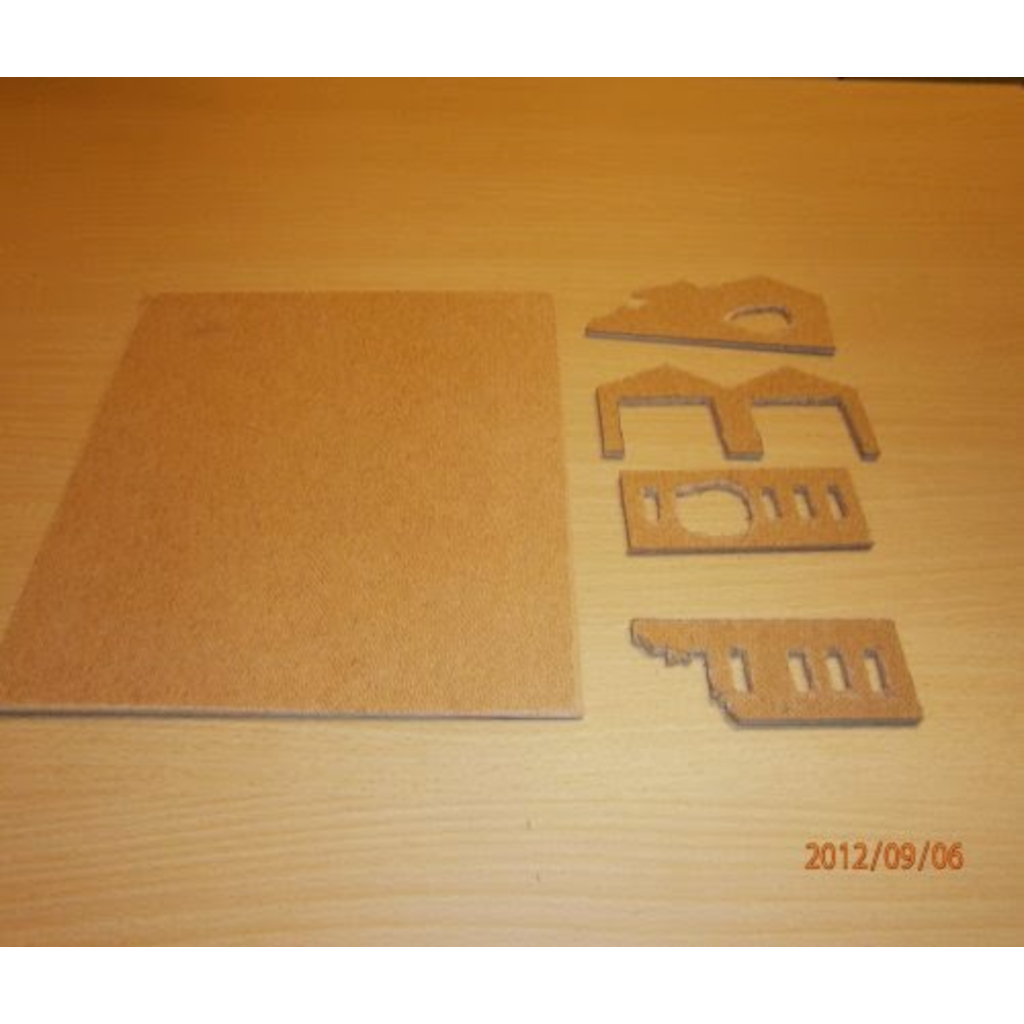
3. The next step was to place my paper template on to my pre-cut hardboard and draw around the template carefully marking the windows and doors. Once this was done I then proceeded to cut the windows and doors out.

4. The next stage was to glue all the walls together, I did this using a glue gun. More instructions further down the page.


Here I have placed some German infantry and a German Tiger tank all from Pendraken Miniature’s so you get an idea of scale.


2. Making Stalingrad Ruined Factory


3. Making Stalingrad Ruined Factory


4. Making Stalingrad Ruined Factory


5. Here you can see me about to take the windows out as you can see it was not the neatest way to do it however as they was ruins I wasn’t too concerned.


6. The next stage was to mark out where the roads were going to be placed did this with a pencil once I’ve done that I then used polycell filler for the road surfaces, the rest was textured with Polycell Textured Ceilings Course Effect.

7. The next stage was to make lift of roofs I did this by using odds and ends of plastic and corrugated cardboard stuck on very thin plywood and then applied battle damage.


8. The next stage was to paint the bases I used Humbrol No. 110 Natural Wood and then lightly dry brushed with Humbrol No. 103 Cream. The buildings were painted with Humbrol No. 67 Tank Grey and lightly dry brushed with Humbrol No. 64 Light Grey. However the roofs were dry brushed with Humbrol No. 160 German Camouflage Red Brown and this was once again was lightly dry brushed with Humbrol No. 103 Cream.


9. The next step is to varnish your bases with Ronseal Diamond Hard Varnish, matt clear.
10. The Last stage is to add Noch Summer Meadow Grass.
Tools
- Pencil
- Tape measure
- Wood saw
- Rasp
- Screwdriver
- Hammer
- Paintbrushes
- Glue Gun
Materials
- Hardboard
- Polycell Filler
- Polycell Textured Ceilings Course Effect
- Ronseal Diamond Hard Varnish, matt clear
- Noch Summer Meadow Grass
- PVA
- Cardboard
Humbrol Colours
- Humbrol No. 110 Natural Wood
- Humbrol No. 103 Cream
- Humbrol No. 67 Tank Grey
- Humbrol No. 64 Light Grey
- Humbrol No. 160 German Camouflage Red Brown
Sources
Other blog categories that may be of interest. 10mm ACW Project, 10mm AWI Project, 10mm AZW Project, 10mm CGW Project, 10mm FIW Project, 10mm Sci-Fi Projects, Aliens, Dropzone Commander, Terra Nova, 10mm WWI Project, 10mm WWII Project, 10mm Zombie Project, Battle Reports & Scenarios, Making Scenery & Terrain, Painting Guides, Shows & Events, Solo Wargaming, Wargaming Projects, Wargaming Rules.
Leave a Reply